There are many cloud hosting providers out there who publish WordPress website and most of them charges around $3 – $4 or more per month. Stay tuned for the upcoming post where I will show you how to host WordPress for FREE !!!
This article describes about how to install WordPress on Ubuntu.
WordPress is a Free and Open-Source content management system developed in php with MySQL as back-end with the capability to extent or implement functionality by using plugins and UI modifications via Themes.
Here, we will Install WordPress in a very small Instance of Linux VM. The installation is done through shell.
System Specs:
Processor - 1 vCPU
Memory - 1 Gb
OS Version - Ubuntu 20.04
Note: This is not an ideal specs for installing WordPress, but works fine for blogs and personal websites.
After the installation of Ubuntu, update and upgrade the OS
sudo apt-get update && sudo apt-get upgrade -yOnce the operating system is updated, follow below steps for installing WordPress
Step-1 : Install Apache Web Server
sudo apt install apache2 -yOnce the installation is completed, check the apache service status
systemctl status apache2
Step-2 : Enable Firewall settings to allow http traffic
sudo iptables -I INPUT 6 -m state --state NEW -p tcp --dport 80 -j ACCEPTTo make the changes permanent even after server restart, run the following command
sudo netfilter-persistent save
Test the above by typing the server ip address in the web browser, we will be able to see the apache default page in the web browser.

Step-3 : Install php package
Run below command to install the latest version of php and associated package
sudo apt install php libapache2-mod-php php-common php-mbstring php-xmlrpc php-soap php-gd php-xml php-intl php-mysql php-cli php php-ldap php-zip php-curl -yStep-4 : Test php Installation
Create a test php file and browse the page in web browser
sudo vi /var/www/html/testpage.phpin the nano editor, add below snippet and save
<?php
echo "The website is working !!!";
?>
Open web browser and browse http://<ip-address>/testpage.php

Step-5 : Install Database – MariaDB
Execute the below command to install Maria DB
sudo apt install mariadb-server -yNote: This installation will take some time to finish.
Once the installation is completed, execute below command to do the initial config.
sudo mysql_secure_installationThe shell will prompt for input when the above command is executed. Follow the input given in the screenshot to complete the setup.

Step-6 : Configure Database
Login to mysql as root and create the database for wordpress
sudo mysql -u rootCreate database and assign permission using below snippet
CREATE DATABASE wordpress;
GRANT SELECT,INSERT,UPDATE,DELETE,CREATE,DROP,ALTER ON wordpress.* TO 'wpuser'@'localhost' IDENTIFIED BY 'password';
FLUSH PRIVILEGES;
exit

Step-7 : Download and Install WordPress
Navigate to home directory and download WordPress package
cd /home/ubuntu
wget https://wordpress.org/latest.tar.gz
Extract the package and copy to the root web folder
tar xf latest.tar.gz
sudo mv wordpress/ /var/www/html/
Modify WordPress folder permission and ownership
sudo chown -R www-data:www-data /var/www/html/wordpress/
sudo chmod 755 -R /var/www/html/wordpress/
Create Upload folder and change ownership
sudo mkdir /var/www/html/wordpress/wp-content/uploads
sudo chown -R www-data:www-data /var/www/html/wordpress/wp-content/uploads/
Step-8 : Make WordPress folder as default web path
Edit apache config file and add the following config details under the tag <VirtualHost *:80>
sudo vi /etc/apache2/sites-available/000-default.conf<VirtualHost *:80> DocumentRoot /var/www/html/wordpress<Directory /var/www/html/wordpress/>Options FollowSymLinksAllowOverride Limit Options FileInfoDirectoryIndex index.phpOrder allow,denyAllow from all</Directory><Directory /var/www/html/wordpress/wp-content>Options FollowSymLinksOrder allow,denyAllow from all</Directory></VirtualHost>
Restart apache service
sudo systemctl restart apache2Step-9 : Final Settings in Linux
Enable url rewrite feature and restart apache
sudo a2enmod rewrite
sudo systemctl restart apache2
Finally, the linux side configuration is completed.
Step-10 : WordPress Configuration
Let’s go to web browser to configure the rest in WordPress. Open web browser and browse the server IP address

Select language and click on Continue

Click on “Let’s go!” button to configure the database details to complete WordPress configuration

Enter the database details as per we have configured in Step-6

WordPress will proceed to the above page if the DB information entered is correct. Click on “Run the installation”

Enter the required login information in WordPress and click “Install WordPress”

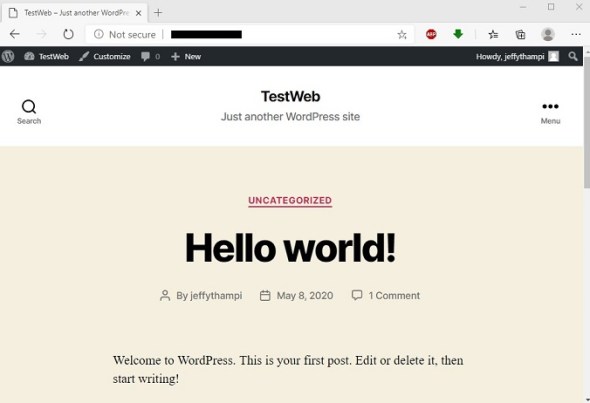
Finally, the installation is completed and WordPress website is ready !!!
To view the website, navigate to http://<ip-address>

To view website admin portal, navigate to http://<ip-address>/wp-admin

Enter the login credential which was set during the installation process and click on “Log In”

Now, its all your. This completes the installation of WordPress in Ubuntu.
Testing the site performance
Browse to url “https://developers.google.com/speed/pagespeed/insights/” and paste the website url. Click on “Analyze” button to get the results

The results are excellent, but this is just a plain website. Once we add more contents, plugins and themes. The analysis rating may go down.
After all, its just 1 CPU and 1GB RAM. Good for blogging and personal websites. As your traffic increases, you can find alternatives which gives more processing power.
Hope you liked the article. Thank you for reading.


Recent Comments